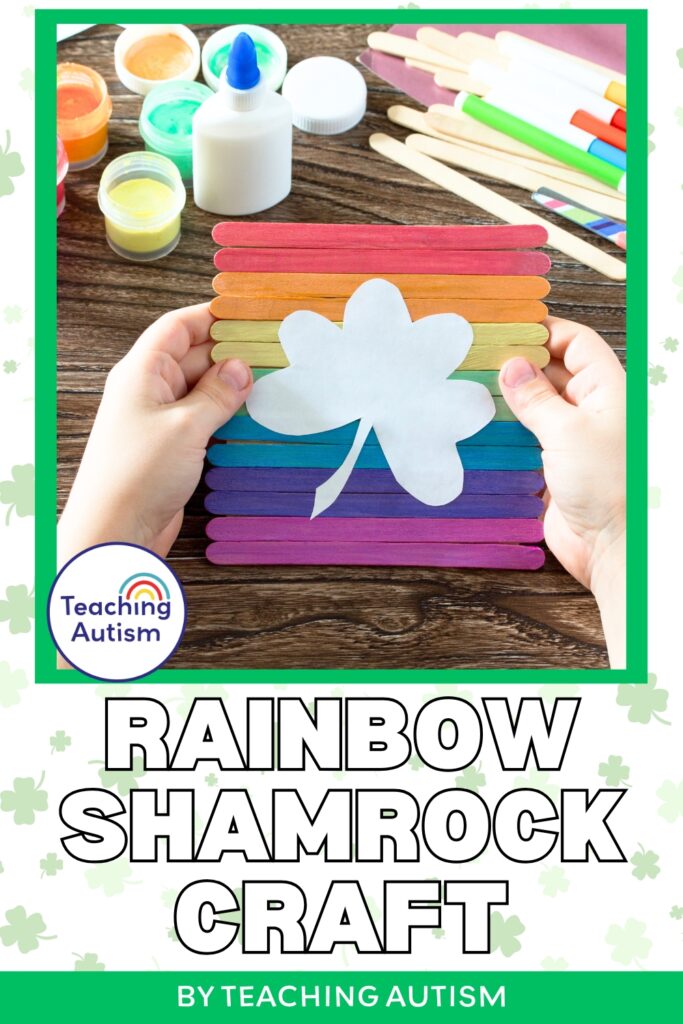
Rainbow Shamrock Craft for kids
This rainbow shamrock craft is the perfect addition to your St Patrick’s Day activities. In this blog post I’m sharing all of the information that you need to re-create this craft with your students (or children at home!) You’ll also find links to other St Patrick’s Day activities and printables that you might like too!
This blog post may contain affiliate links. This means that if you purchase an item through my affiliate link, I may receive a % of commission at no extra cost to you. This helps support me, my family and my blog to bring you great content for free!
St. Patrick’s Day is all about rainbows, shamrocks, and a little bit of luck! This Rainbow Shamrock Craft is a perfect way to bring some festive fun into your classroom, homeschool, or family craft time. It’s bright, engaging, and great for fine motor skills, color recognition, and creative expression.
This craft is easy to set up and lets kids explore color blending, painting, and cutting skills while celebrating Irish culture and the magic of St. Patrick’s Day. So grab some craft sticks and paint, and let’s get started on this fun, hands-on rainbow shamrock craft!
Why You’ll Love This St. Patrick’s Day Craft
This rainbow shamrock project isn’t just a cute holiday decoration—it’s also a great learning experience for young learners. Here’s why it’s the perfect addition to your St. Patrick’s Day lesson plans:
- Fine Motor Skill Development – Cutting, gluing, and painting all help strengthen hand muscles.
- Color Recognition & Order – Kids practice putting colors in rainbow order, reinforcing patterning skills.
- Scissor & Hand-Eye Coordination Practice – Tracing and cutting out the shamrock shape builds important pre-writing skills.
- Creativity & Artistic Expression – Kids can experiment with different colors, patterns, and textures.
- St. Patrick’s Day & Irish Culture Connection – This craft is a great conversation starter about St. Patrick’s Day traditions and symbols.
Materials You’ll Need
- Popsicle sticks (regular or jumbo size)
- Acrylic or tempera paint (red, orange, yellow, green, blue, purple)
- White cardstock or construction paper
- Shamrock template (or draw your own!)
- Scissors
- Glue or hot glue gun (for stronger hold)
- Paintbrushes or sponge brushes
- Markers, glitter, or sequins (optional for extra decorations!)
MY ART & CRAFT ESSENTIALS
If you want to see what is stocked inside my art and crafts cabinet, check out my must-have list below;
*These links are affiliate links.
Step-By-Step Instructions
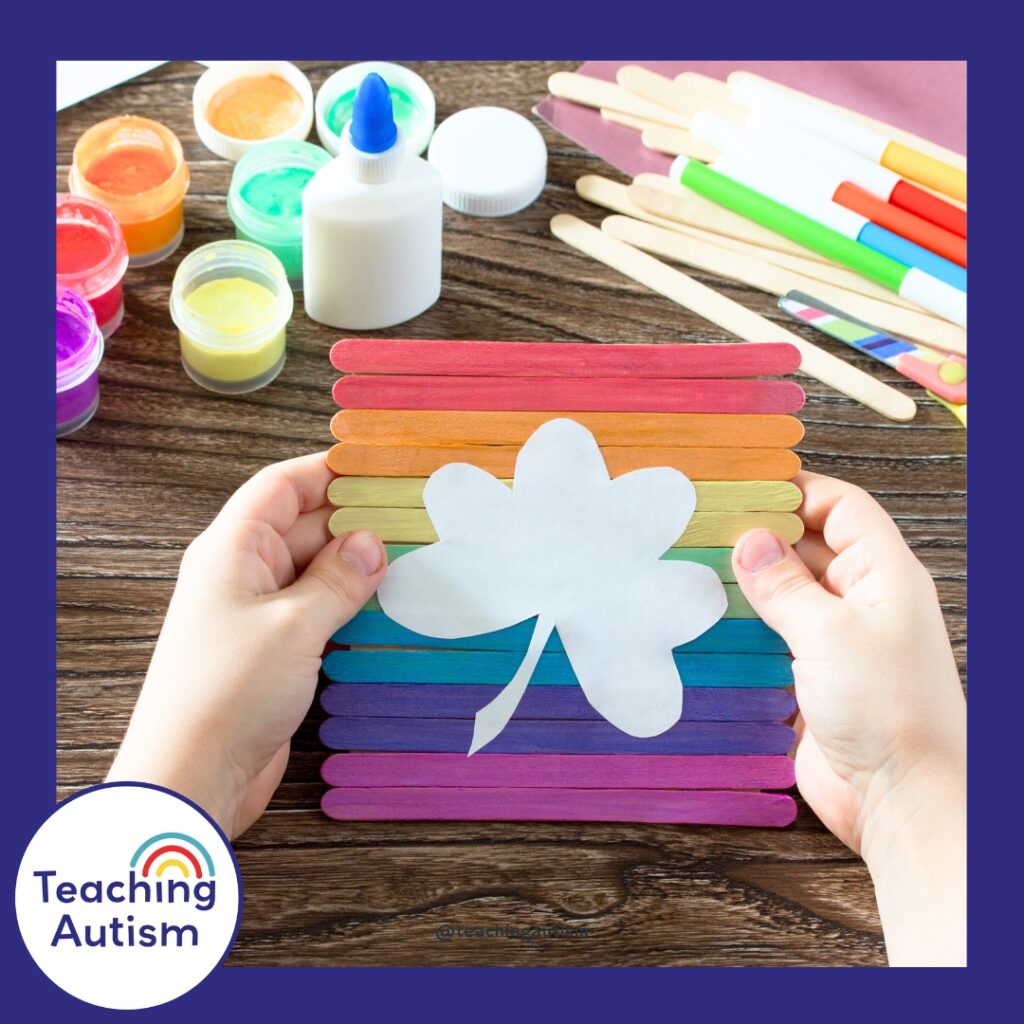
1: Paint the Popsicle Sticks
- Lay out seven popsicle sticks and paint each one a different color of the rainbow (red, orange, yellow, green, blue, indigo, and violet).
- Let them dry completely before moving to the next step.
2: Assemble the Rainbow Background
- Once dry, line up the popsicle sticks in rainbow order.
- Use glue or a hot glue gun to attach two horizontal popsicle sticks across the back to hold them together.
3: Create the Shamrock Shape
- On white cardstock or construction paper, draw a shamrock shape or print a shamrock template.
- Carefully cut out the shamrock, making sure it’s big enough to fit on the rainbow background.
4: Attach the Shamrock to the Rainbow
- Glue the shamrock cutout onto the rainbow popsicle stick background.
- Press down gently and let it dry.
5: Add Final Decorations!
- If you want extra sparkle, add glitter, sequins, or even small gold coins around the shamrock.
- Use a marker to outline the shamrock for a bold effect.
6: Display Your Rainbow Shamrock
- Once the craft is completely dry, display it on a classroom bulletin board, fridge, or wall!
- You can also add a string to turn it into a hanging decoration.
Ways to Adapt This Craft for Different Learning Needs
This craft is super versatile! Here’s how you can modify it to fit different abilities:
Younger Kids or Those Needing Extra Fine Motor Support:
- Use jumbo-sized popsicle sticks for easier handling.
- Offer pre-cut shamrocks instead of having students cut their own.
- Let them use stickers or stamps instead of painting.
Kids Who Love Art & Creativity:
- Let them paint the shamrock gold or add rainbow swirls instead of leaving it white.
- Use different shades of green to create a gradient shamrock effect.
- Let kids design their own shamrock shape instead of using a template.
For a Literacy or Writing Connection:
- Have students write one thing that makes them feel lucky on the back of the craft.
- Create a classroom “Lucky Wall” where your students can display their crafts and write about what luck means to them.
Helpful Links
You may also like;
- Free St Patrick’s Day Adapted Book
- 10 Picture Books for St Patrick’s Day
- 5 Sensory Activities for St Patrick’s Day
- St Patrick’s Day Classroom Crime Scene
- 15 Free St Patrick’s Day Activities
- St Patrick’s Day Activities and Printables
- TpT – St Patrick’s Day Activities and Printables
If you found this blog post helpful please consider sharing it with your friends and colleagues on social media.
P.S. Have you signed up for my VIP membership yet? If not, head on over and sign up now. You’ll get access to hundreds and hundreds of resources, templates, crafts and more being uploaded every month!
Nikki

2 Comments