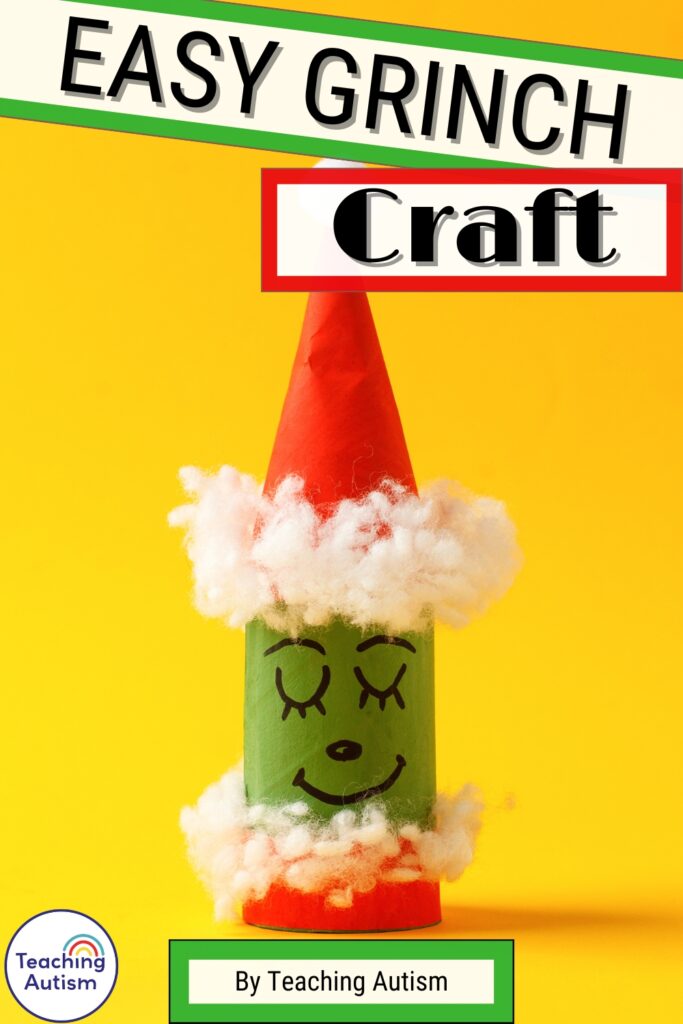
The Cutest Grinch Christmas Craft for Your Classroom
The Cutest Grinch Christmas Craft for your classroom is finally here – and trust me, you’re going to love it as much as your students do! Christmas is hands-down my favorite time of the year, especially in the classroom. There’s just something so magical about that final stretch before winter break – the twinkly lights, the smell of cinnamon, the cozy jumpers, and of course… the crafts!
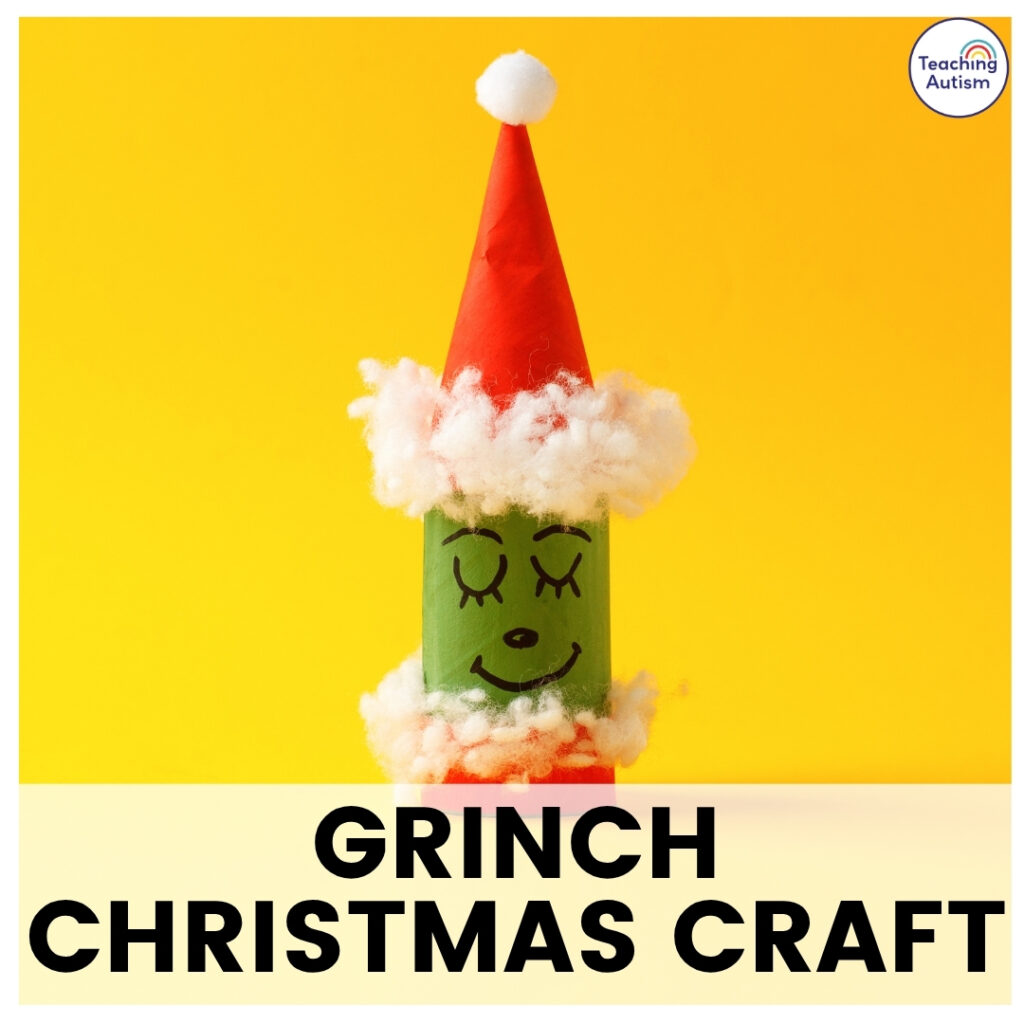
Every December, I try to come up with something festive, low-prep, and adaptable for all my students – and this little green guy has stolen my teacher heart. This Grinch craft is bright, cheerful, and super easy to make with supplies you probably already have tucked away in your classroom cupboards (yes, even if you’re down to your last glue stick and a few cotton balls).
It’s perfect for SPED classrooms, preschool, or early years settings – simple enough for little hands, but full of creative possibilities for every student. Plus, the Grinch’s adorable sleepy smile is guaranteed to bring a bit of Christmas cheer to your classroom walls!
This blog post may contain affiliate links. This means that if you purchase an item through my affiliate link, I may receive a % of commission at no extra cost to you. This helps support me, my family and my blog to bring you great content for free!
Why Christmas Crafts Matter in the Classroom
Let’s be honest – December can feel a little wild. Between end-of-term assessments, holiday concerts, and the excitement of Santa’s impending arrival, keeping students engaged can be… a challenge!
That’s why Christmas crafts are one of my favorite go-to activities. They’re not just “busy work.” They:
✨ Build fine motor and scissor skills
✨ Encourage following multi-step directions
✨ Promote creativity and independence
✨ Provide sensory input (hello, cotton balls!)
✨ Create wonderful keepsakes for families
And most importantly – they bring joy. Even students who might struggle with communication or focus absolutely light up when they see festive materials come out. The Grinch craft is a great mix of structure and freedom – everyone’s Grinch ends up with its own unique personality!
Supplies You’ll Need
Here’s what you’ll need to make your own little Grinch:
- Toilet paper roll or cardboard tube
- Green paint (acrylic or tempera both work great)
- Red and white construction paper
- Cotton balls or fiber stuffing
- Glue (PVA or glue stick for less mess)
- Black marker or pen
- Small white pom-pom (for the Santa hat tip)
- Optional: Googly eyes, glitter, stickers, or anything extra fun you want to add
MY ART & CRAFT ESSENTIALS
If you want to see what is stocked inside my art and crafts cabinet, check out my must-have list below;
*These links are affiliate links.
If you’re prepping this for a classroom activity, I recommend painting all the toilet rolls green the day before – it saves a lot of time (and prevents those “why isn’t it dry yet?” moments).
You can also pre-cut red triangles for the hats if you’re working with younger or fine-motor-challenged students.
Step-by-Step Instructions
Let’s break it down!
1. Paint the Grinch’s Body
Start by painting the cardboard roll a nice Grinchy green. Depending on your paint type, you might need two coats for full coverage.
Teacher tip: Pop a pencil through the middle of the roll and hold it while painting – it keeps hands clean and the roll steady. Then, stand them upright in a cardboard box or egg carton to dry.
2. Make the Santa Hat
Cut out a red triangle from construction paper. You can adjust the size based on your cardboard roll height – roughly 3–4 inches tall works nicely.
Roll the triangle into a cone shape and glue or tape the edge to secure.
Once it’s dry, add a small white pom-pom at the top.
Then, stretch out a few cotton balls to create fluffy “fur” for the hat’s trim. Glue this around the bottom edge of the red cone.
This part is gold for sensory input – kids love pulling and stretching the cotton!
3. Add the Grinch’s Face
Now it’s time for personality! Using a black marker or pen, draw your Grinch’s facial features.
You can go classic (smirking Grinch) or cute (sleepy, happy Grinch) – it’s totally up to you and your students’ preferences.
If your students aren’t confident drawing, pre-draw simple eyes and smiles for them to trace. Or let them use googly eyes for extra fun!
Encourage them to give their Grinch emotions – sleepy, silly, or mischievous. You’ll be amazed how expressive they can make them with just a few lines.
4. Glue on the Hat and Beard
Once your paint is completely dry, pop the hat onto the top of the roll and glue it down.
Next, add cotton around the bottom of the roll to create a fluffy Grinch beard and collar. You can also glue small tufts around the back or sides for extra fluff if you want a super cozy look.
5. Finishing Touches
If you’re feeling extra festive, you can add a tiny paper heart (because even the Grinch’s heart grows three sizes, remember?).
Or let students decorate the background, maybe add snowflakes, sequins, or glitter on a paper plate base for a little extra sparkle.
Every classroom version I’ve ever done has ended up looking slightly different and that’s part of the magic. Each Grinch gets its own unique twist.
Classroom Adaptations
Because every classroom is different, here are a few simple ways to adapt this craft for various abilities and sensory needs:
💚 For fine motor support:
Use larger pieces (bigger hats, less cutting) and pre-cut cotton strips instead of loose fluff.
💚 For sensory-sensitive students:
Offer alternatives to cotton (like tissue paper or soft felt) for those who don’t like the texture.
💚 For early learners or non-writers:
Have pre-drawn Grinch faces to colour in or trace, and let them focus on assembling the pieces.
💚 For older or higher-ability groups:
Challenge them to design different Grinch emotions, grumpy, surprised, joyful, and display them as a “Grinch Feelings Chart” on your classroom wall.
It’s a sneaky way to blend art with social-emotional learning!
Cross-Curricular Ideas
If you want to extend the craft into a full lesson (or even a Grinch-themed week), here are some fun cross-curricular tie-ins:
- Literacy: Read How the Grinch Stole Christmas* and discuss the story’s message about kindness and change.
- Math: Count cotton balls, measure hat height, or graph students’ favourite Christmas characters.
- Social Skills: Talk about feelings – why was the Grinch grumpy? What helped him change?
- Fine Motor: Practice cutting, gluing, and pinching cotton – all excellent for hand strength.
*affiliate link
You can even pair this activity with a simple writing prompt like:
“If I met the Grinch, I would teach him to…”
or
“The Grinch’s heart grew three sizes because…”
Why This Craft Is a December Winner
There are a million Christmas craft ideas out there, but this one ticks every box for me:
- Minimal prep
- Uses recycled materials
- Works for multiple ages and abilities
- Fun, festive, and full of fine motor practice
- Looks amazing on a classroom display board
You can easily create a whole “Who-ville” wall with these – just line up everyone’s Grinches, add some cotton snow, and maybe a paper Christmas tree in the middle. Instant festive cheer!
Teacher Tips for Smooth Craft Sessions
If you’ve been around my classroom, you’ll know I’m all about practical planning. A few tips for avoiding chaos:
- Pre-paint rolls if possible (or do this as a sensory paint station earlier in the week).
- Use trays or plastic tablecloths to catch stray cotton and paint splatters.
- Work in small groups – perfect for 1:1 or small-group SPED settings.
- Have drying space ready! Grinches need a safe spot to sit while their glue dries.
- Play Christmas music while you craft. Nothing sets the mood quite like “You’re a Mean One, Mr. Grinch.”
Display and Celebrate!
Once everything’s dry, display your Grinches proudly around the classroom. They make adorable shelf decorations or even a cheeky classroom display captioned:
“Our Hearts Grew Three Sizes This Christmas!”
You can also turn them into Christmas gifts for families by adding a little tag that says:
“Merry Grinch-mas from [Child’s Name]!”
Parents absolutely love seeing handmade crafts like these come home. They’re charming, personal, and full of heart – the best kind of keepsake.
I always say that Christmas in the classroom is about more than crafts – it’s about creating memories, laughter, and moments of joy that stick with our students long after the decorations come down.
But if there’s one project that captures the spirit of the season and keeps little hands busy in the best way, it’s this Grinch craft.
It’s simple, budget-friendly, and guaranteed to make your classroom feel a little brighter (and a little less grumpy!).
So grab your paint, fluff up that cotton, and let’s spread some Whoville cheer!
Merry Grinch-mas, friends – and don’t forget to tag me if you make this in your classroom. I love seeing your students’ versions of these festive crafts.
Helpful Links
You may also be interested in the following;
- Snow Globe Craft
- Snowman Cinnamon Buns
- Christmas Around the World Picture Books
- Rudolph Handprint Craft
- Christmas Tree Fingerprint Ornament Craft
If you found this blog post helpful, please consider sharing it with your friends and colleagues on social media, it helps more teachers find support, and it means the world to me and my little family too.
And if you haven’t already, be sure to check out my Free Resource Library for tons of classroom tools, visuals, and printables to make your teaching life easier (and a whole lot more fun!).
P.S. Have you signed up for my VIP membership yet? If not, head on over and sign up now. You’ll get access to hundreds and hundreds of resources, templates, crafts and more being uploaded every month!
Nikki