
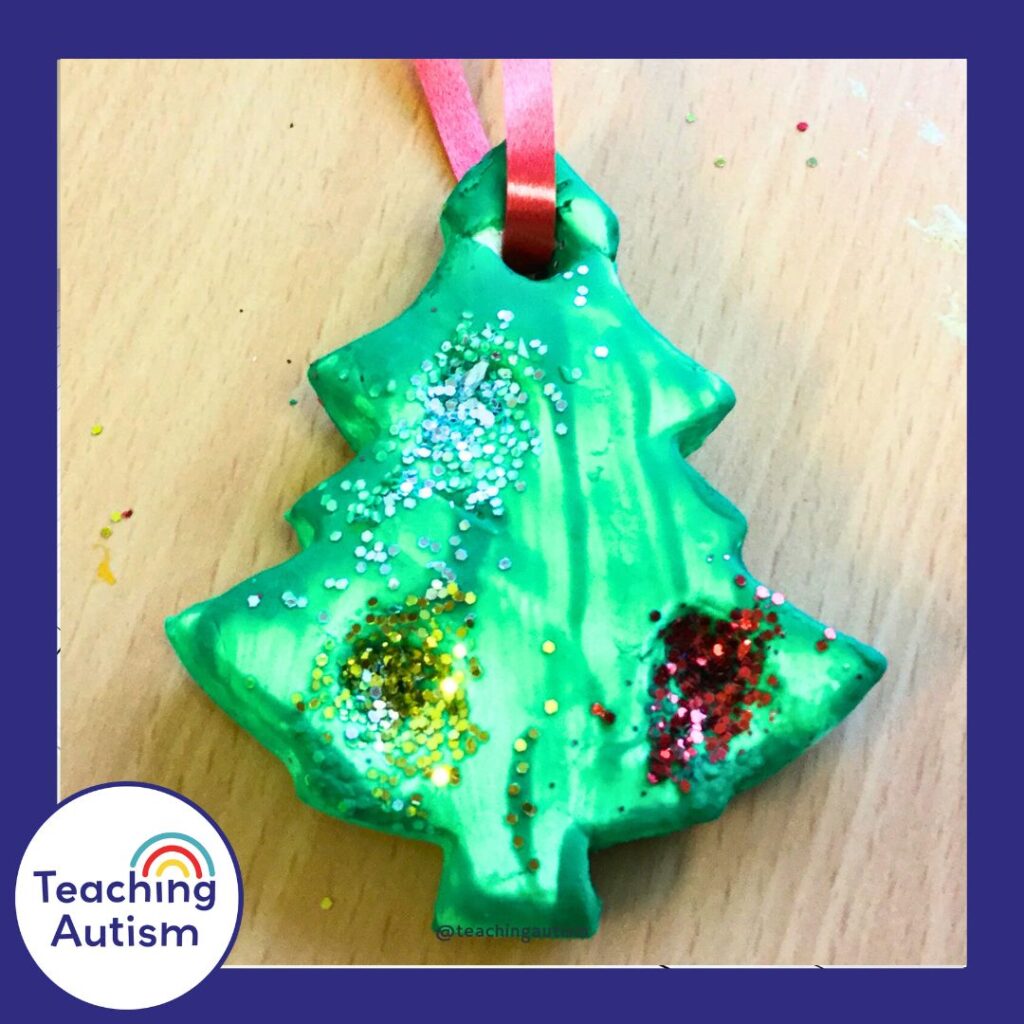
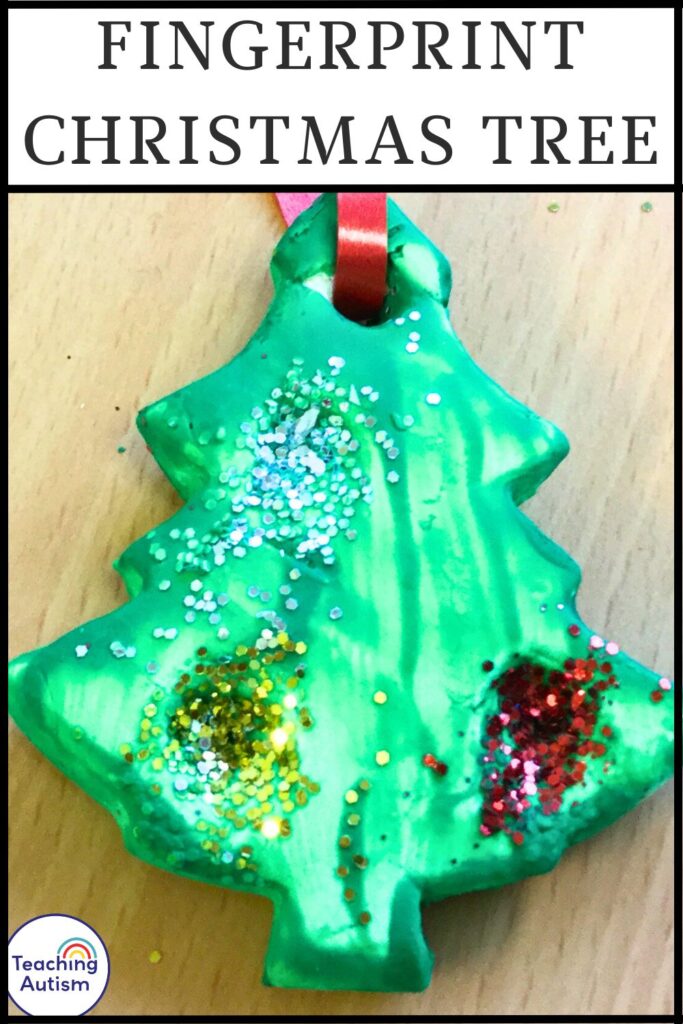
Christmas Tree Ornament Craft
As part of my Christmas 2017 blog series, today I’m sharing our handmade Christmas tree ornament. This ornament is the perfect Christmas craft to do with your students in your classroom. It’s easy to make and each one will have an individual look to it – making them the perfect gift to send home.
This blog post may contain affiliate links. This means that if you purchase an item through my affiliate link, I may receive a % of commission at no extra cost to you. This helps support me, my family and my blog to bring you great content for free!
Why I Love This Craft
Not only is it festive and fun, but this activity supports so many important skills:
- Fine motor development (rolling, cutting, pressing, painting)
- Sensory exploration (texture of clay, paint, glitter)
- Creativity and choice-making (placement of fingerprints, colours, glitter)
- Emotional connection – students love making something for a loved one!
They also make a perfect keepsake. Those tiny fingerprints turn into little baubles on the tree, and families often cherish them year after year.
Materials Needed
You’ll need the following materials (I’ve listed both UK and US shopping lists to make it easy for you wherever you’re based):
US Shopping List
- Air drying clay.
- Christmas tree cutter.
- Straw.
- Ribbon.
- Scissors.
- Glitter.
- Green paint.
- Craft aprons.
- Paintbrushes.
- Rolling Pin.
- Glue.
UK Shopping List
- Air drying clay.
- Christmas tree cutter.
- Straw.
- Ribbon.
- Scissors.
- Glitter.
- Green paint.
- Craft aprons.
- Paintbrushes.
- Rolling Pin.
- Glue.
Instructions
- Roll out the clay to around ½ cm thickness.
- Cut out tree shapes using the cookie cutter.
- Use a straw to punch a small hole at the top for the ribbon.
- Make fingerprints by gently pressing student fingers into the tree. These will become “baubles.”
- Let the clay dry fully – this may take 1–3 days depending on your environment.
- Paint the trees green and leave to dry.
- Add glitter: Put a dab of glue into each fingerprint and sprinkle with glitter. Let dry.
- Thread ribbon through the top hole and tie to complete the ornament.
Tips for Success
- Do it in stages over a few days – especially in SPED classrooms where processing time and transitions matter.
- Prep stations: Set up one table for clay cutting, another for painting, and another for glitter.
- Use visual instructions or step-by-step visuals to support non-readers or those needing extra structure.
- Offer choices: Let students pick from different ribbon colours, glitters, or even paint a rainbow tree if that’s their jam!
Prefer to Make Your Own Salt Dough?
If you don’t have access to air drying clay, or just want a more hands-on, sensory experience, salt dough is a fantastic (and budget-friendly) alternative!
It’s easy to make with ingredients you likely already have in your kitchen or classroom.
Here’s a simple salt dough recipe:
Ingredients:
- 2 cups plain flour
- 1 cup salt
- ¾ cup water (add gradually)
Instructions:
- Mix the flour and salt in a large bowl.
- Slowly add the water, a little at a time, stirring as you go.
- Once it starts coming together, knead the dough with your hands until it’s smooth and pliable.
- Roll it out and use cookie cutters just like you would with clay.
- Don’t forget to poke a hole for the ribbon using a straw!
Drying options:
- Air dry for 2–3 days, turning occasionally to help them dry evenly.
- Oven dry at a low temperature (around 100°C / 210°F) for 2–3 hours. Keep an eye on them to avoid browning or cracking.
Once fully dry, you can decorate your salt dough ornaments the same way – paint, glitter, ribbon, the works!
Top Tip: If you want a smoother finish for painting, you can lightly sand the surface once dry with fine sandpaper.
Make It Part of a Gift Package
You can take this craft a step further by turning it into a full gift experience. Have students decorate gift tags or cards to go with their ornaments. You can even wrap them in tissue and send them home in decorated paper bags.
If you’re looking for even more thoughtful and classroom-friendly ideas, this post has some lovely inspiration for Christmas presents for parents – all of them simple to prep and adaptable for students of all abilities.
Display Ideas
If you’re not sending them home right away, these ornaments also look gorgeous:
- Hanging from a classroom tree
- Tied to a class-made garland or mobile
- Displayed on a festive bulletin board with student names
Just be sure to label them clearly so they don’t get mixed up!
I hope this craft brings some festive joy to your classroom like it has mine. It’s such a lovely way for students to express themselves and share something special with the people they care about.
If you give it a go, I’d love to see how yours turn out – tag me on social media or drop a photo in the comments.
If you found this blog post helpful, please consider sharing it with your friends and colleagues on social media, it helps more teachers find support, and it means the world to me and my little family too.
And if you haven’t already, be sure to check out my Free Resource Library for tons of classroom tools, visuals, and printables to make your teaching life easier (and a whole lot more fun!).
More Christmas Activities
- Free Santa Star Visual Recipe
- Santa Craft Writing Prompt – Free
- 7 Free Christmas Sensory Bins
- All My Favorite Christmas Lessons and Activities
P.S. Have you signed up for my VIP membership yet? If not, head on over and sign up now. You’ll get access to hundreds and hundreds of resources, templates, crafts and more being uploaded every month!
Nikki


One Comment