Free Visuals to Help with Waiting
I’m so excited to share these free visuals to help with waiting for your students! Waiting is tough. Teaching how to ‘wait’ is one of the hardest tasks that I have as a teacher with my kiddos – and their parents do too. That’s why I created these free visuals to help with waiting.

Visuals are always my first go-to. People seriously underestimate how powerful a visual resource can be. It can help to provide that visual understanding of what they are waiting for, how long they have to wait, or just to let them know, right now we have to wait.
A lot of the time my students just don’t understand why they have to wait. Why can’t they just have their food? Why do they have to stand behind these people? For them, there’s just a lack of understanding. This is why I always work with parents to ensure it’s one of the first skills we begin working on.
Waiting is an important life skill. And in my classroom, life skills are always one of our top priorities – and parents are so grateful for this. By teaching waiting, we’re helping to prepare our students for the real world. To help them manage in the future with their day-to-day life. And it’s one of the most important social skills to learn.
What Visuals?
There are so many different types of visuals to use, how do we know what ones to use? I’m going to share with you my top 3 visuals that we use for teaching waiting skills.
1. Turn Taking
Turn taking is the WORST, right? My students just don’t understand why they have to take turns. Why can’t they have the toy now? And when my students come in, they’re real young. Some have never been to school before or socialised with other children. You can imagine how well turn taking goes down.
That’s when I pull out my trusty turn taking cards. You might think I’m crazy – a lot of people did when I first started using them in the classroom. But, they work wonders.
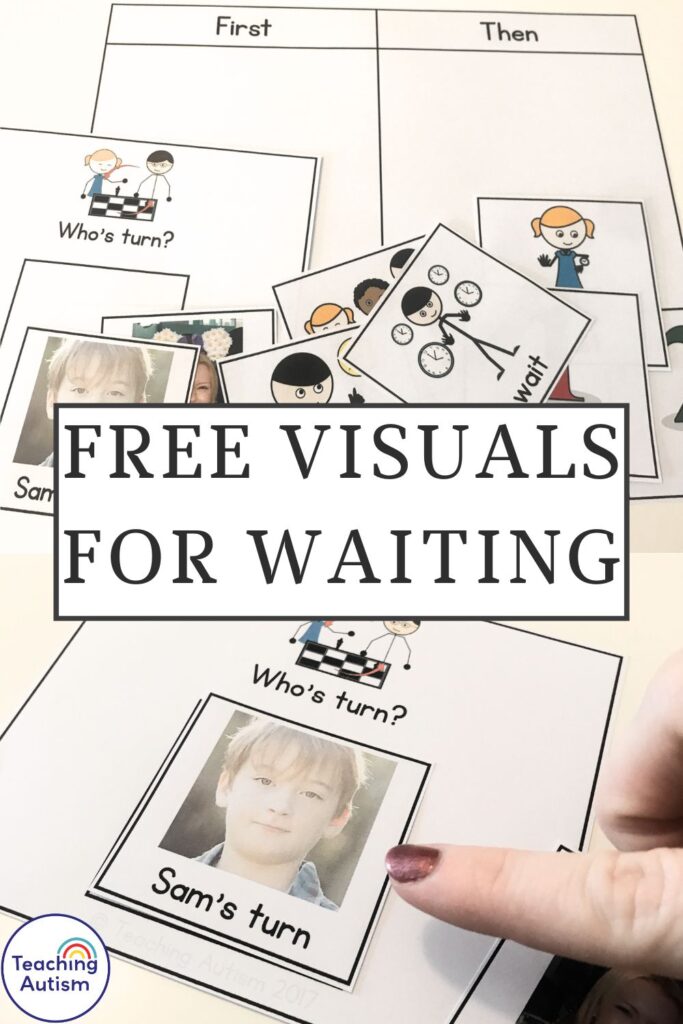
It helps my students to visually see who’s turn it is. I start teaching this skill and using this visual with myself and 1 student. This is a way to get them started with using the visual and understanding what it means.
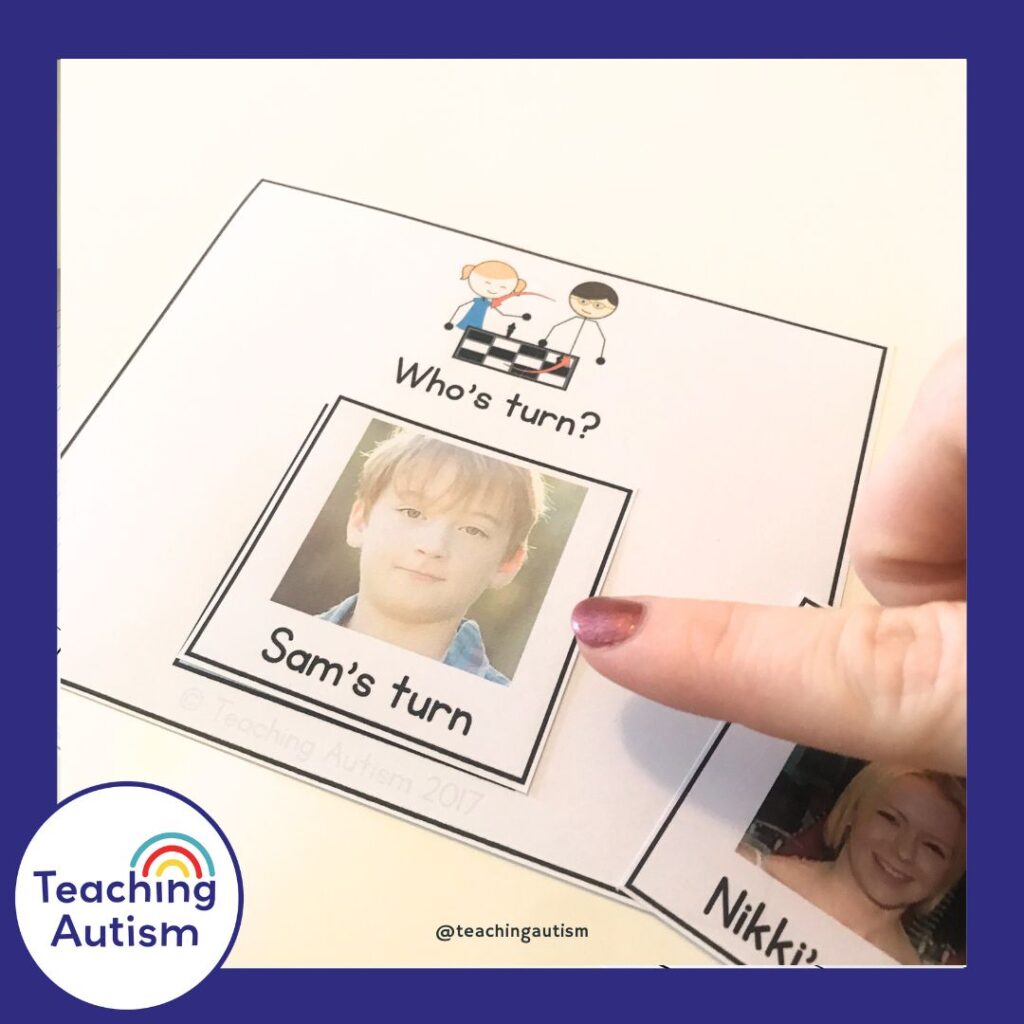
So, how do I use it?
- First, get photos of the 2 people who will be using the game/toy/item and this visual. I recommend starting to use this visual with turn-taking games where you get 1 turn each. It will help students get used to the visual quicker.
- The person who’s turn it is right now, their face gets put onto the ‘Who’s turn?’ board.
- The person who has to wait for their turn, can either hold their face or keep it on the table.
- When that person has finished their turn, they take their face off the visual board. The next person who’s turn it is now gets to put their face onto the visual.
- It’s such a simple idea, yet it works wonders! You’ll also be helping to improve independence
This visual doesn’t just have to be used when a teacher is present. Once your students have started to master using this visual, give it to them to use! Let students play on games together using this visual turn taking card. They can move their faces on and off as their turn comes and goes.
2. Generic Waiting
I use these visuals for ‘generic’ waiting and there’s no right or wrong way to use them really. I love having symbols or visuals on hand that can have multiple uses.
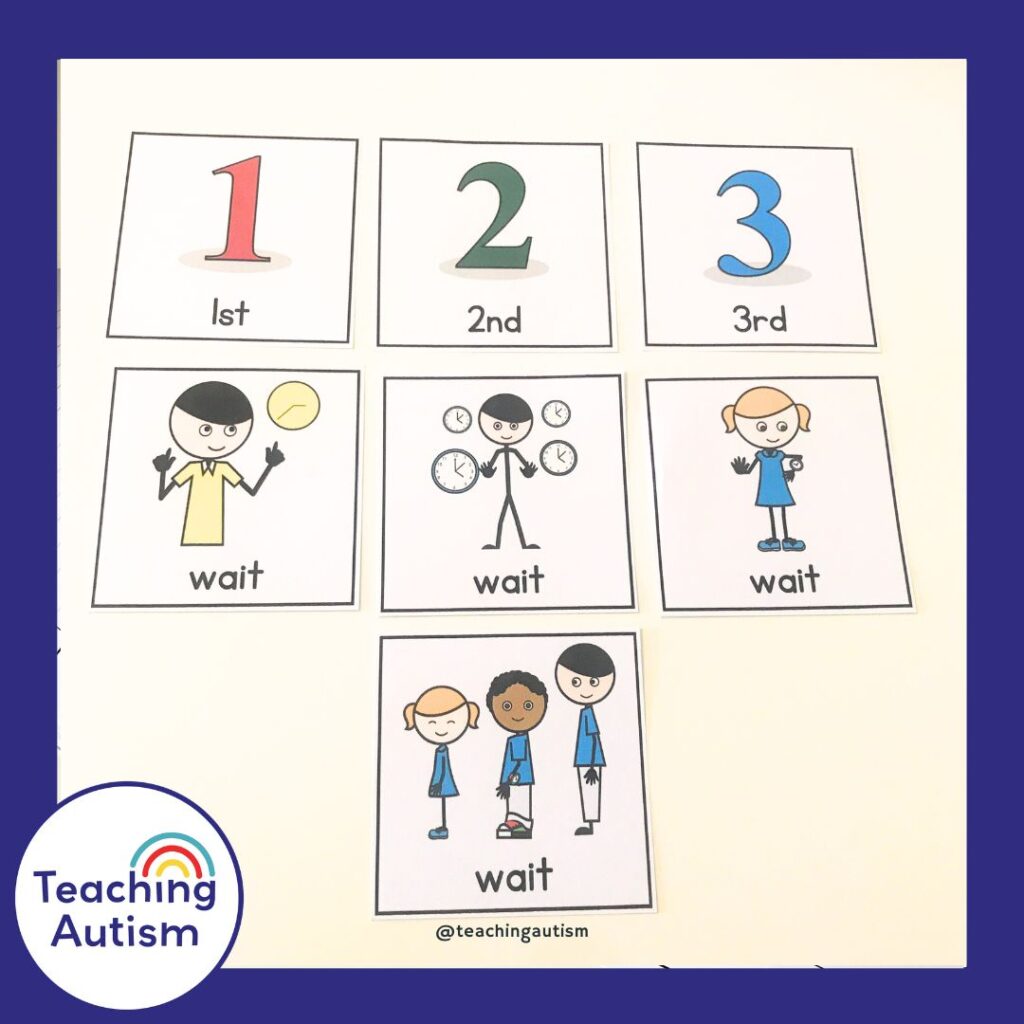
These can either be kept in your pocket or on a keyring. I like to put them on a keyring and then I make sure to always have a few on me. Below, I’ll explain a little how I use the different visuals.
‘Wait’ symbols are used for just that – showing the student that they have to wait. I have a few different visuals for this, because they can be useful for different concepts. Especially if waiting in line for example. For this, I like to use the visual that shows a line of people and that we have to wait in this line.
People are always intrigued with my ‘first’ ‘second’ and ‘third’ visuals. I use these with my higher understanding students. They are great to use in class or out and about. One of the main ways we use these tends to be in playgrounds. You know how you go to a massive playground, with loads of different equipment, but all your students want the same thing? Yep, that happens to us too!
It’s always the big rubber tyre swing that my students want. So, to stop them all squabbling about who is next, we hand out ‘first’ ‘second’ and ‘third’. They get given the visual and then they know what place they are in line. It’s just a great visual reminder, and it means they can go and do something else and then come back. For situations like this we have a visual timer on the iPad that we take with us. It’s a great way to ensure everyone is having the same amount of time.
3. First and Then
So, I saved the best for last. First and then visuals. If you’re not using these, seriously I don’t know how you’re managing. First and then visuals are just amazing. That’s it. There’s no other words for them – they are just amazing. They are so helpful to have and I recommend that every classroom has a set. Personally, I have a set for every student in my class, along with spares.
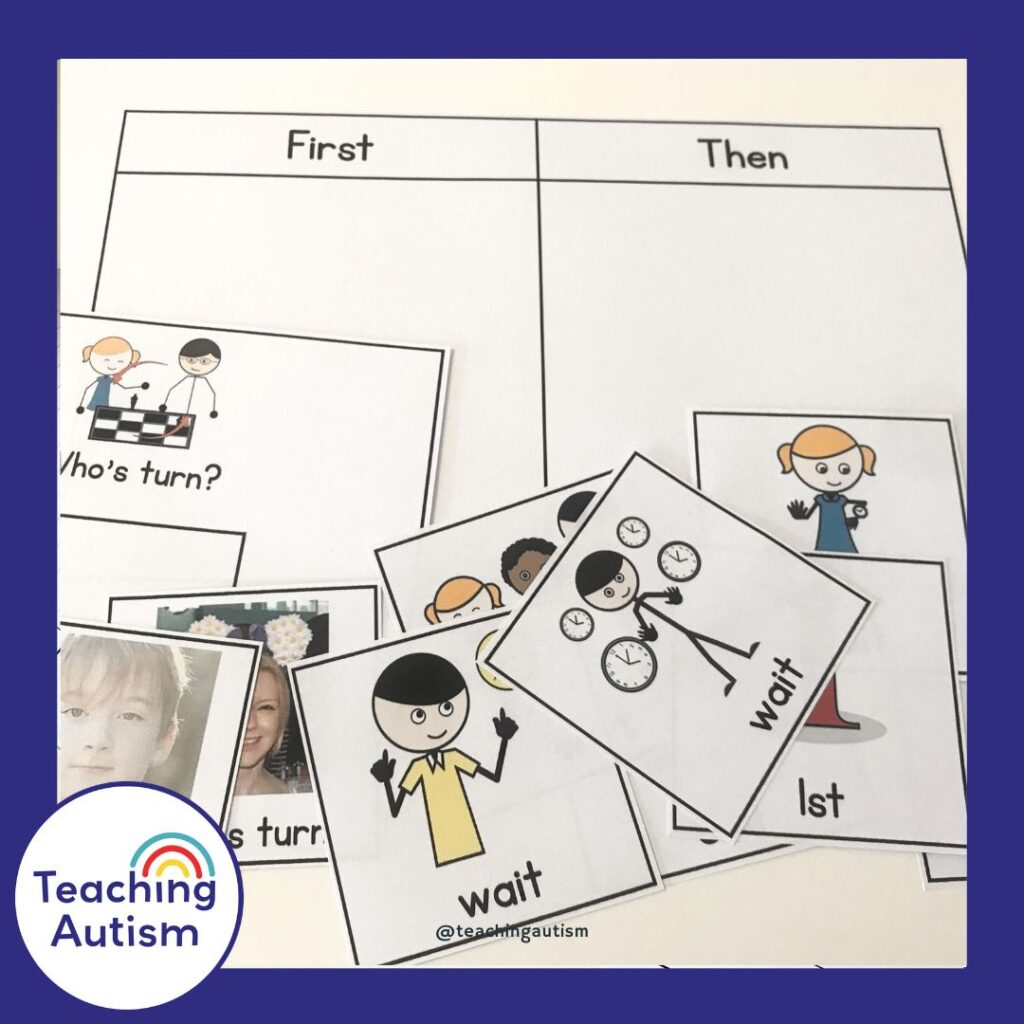
Basically, a first and then board is literally as it sounds. You put a symbol under ‘first’ for what you want your student to do first. And then you put a symbol under ‘then’ for what they get when they complete the ‘first’ action.
I also use this for turn taking to let my students know that it’s ‘Sam’s turn’ first and then it’s ‘Alex’s turn’ etc. You can use this as a reward system too. First ‘read a book’ then ‘playground’ or if you’re waiting in line, first, ‘wait’ and then ‘see Santa!’ etc.
Honestly, for such simple, visual ideas, they can be used in so many ways.
Do you want to use these visuals in your classroom? You can grab them free on my free resource library – along with a huge amount of other free resources! All you have to do is sign up to my mailing list (here) and you’ll be sent another free resource on sign up and a password to access my free resource library where you can download this ‘Waiting Visuals’ pack.
What do your students find the most difficult to wait for? Or are you looking for new ideas to work on waiting skills with your students? I’d love to hear from you. Leave me a comment below!
If you found this information helpful, please consider sharing it with your friends and colleagues on social media.
P.S. Have you signed up for my VIP membership yet? If not, head on over and sign up now. You’ll get access to hundreds and hundreds of resources, templates, crafts and more being uploaded every month!
Nikki
